Monday 21 October 2013

Day 10: Monday

Brazing the rear triangle

When I came back to my chainstays this morning and set everything up in the jig, they somehow turned out to need quite a bit of work to get them to line up correctly at the bottom bracket and dropouts.  That took most of the morning with a lot of adjusting and comparing, but eventually they were ready to be tacked at the bottom bracket.


The dropouts were next, brazed into their slots and then the ends of the chainstays filled with braze. You can see that that the seatstays line up beautifully:


When that was complete I took the frame out of the jig and we tested it for straightness.  I guess it could have been worse - but the amount of brazing I've done and my somewhat inexpert approach to it meant that it did need a few tweaks outside in a truing stand against a skip to get the front triangle into alignment - first the seat tube and the headtube, in relation to the bottom bracket.

After that it was back into the workshop to braze on the chainstays at the bottom bracket:


That's how it looks while you're brazing it,  in full colour it looked like this:

Once those were brazed in position it was time to set up the alignment, using among other things a pair of dropout alignment tools (and also a large plank of wood!):


We also checked that the dropouts were wide enough apart, were in line when a wheel was inserted and didn't have any offset.

I finished the day off with a little more filing of the chainstay brazes.

Just the seatstays and brazeons to do tomorrow and it'll be complete.  Yay!

Sunday 20 October 2013

A Few Notes

I'm posting this more for my benefit than anyone else's but it does give you a bit of an insight into some of the technicalities involved when building a frame from scratch.

Bottom Bracket Shell
  • Identify right hand (drive) side by screwing in a spare bearing cup / crank cartridge etc.
  • Measure outer diameter
Seat Tube
  • Locate top of it by sliding a seat post into it.  Mark top and bottom. Check a second time to make sure you got it right.
  • Mark Centreline
  • Mark and cut 90 degree mitre in the bottom end so it butts up to the bottom bracket shell and so that the centreline passes through the larger parts (or ears, tabs etc.) of the mitre
  • When placed in the jig, ensure that the centreline is facing into the frame as you'll be using this to position the bottle cage mounts. These are 65mm apart.
Down Tube
  • Identify long and short butts by looking down the middle
  • Mark centreline
  • The short butt is the bottom end
  • Mark and Cut a 90 degree mitre in the bottom end so that it butts up against the bottom bracket shell.  Ensure that the centreline passes through the larger part just as with the seat tube, for the same reason
  •  When placed in the jig, ensure that the centreline is facing into the frame (upwards) as you'll be using this to position the bottle cage mounts.
Seat Tube and Downtube: bottle cages.
  •  Check location for bottle cages either by measuring an existing bike (note that the frame angles might be different or by getting two bottle cages and fitting them to your frame.
  • Note that the seatpost won't go below the top bottle cage mount so don't put it too high
  • Ensure that the top tube doesn't get in the way or either bottle.
Set up the Jig
  • Set up the seat tube angle as per the CAD plan
  • Set up the head tube angle
  • Set the bottom lug height at the front
  • Set the front axle height in relation to the bottom bracket and fork rake
  • Put bottom bracket shell into jig, along with seat tube at correct angle
Down Tube (again)
  • Measure required length (NB ensure that you understand if you're measuring the outer dimensions (i.e. ear to ear) or inner dimensions (i.e. between tubes at the lowest points of the mitre)
  • Attach mitre template at correct location + 5mm for adjustment (biggest cut out goes at the bottom)
  • Trial fit into jig to ensure that it'll be long enough(or just too long) once cut to length.
  • Once satisfied, hacksaw to length +5mm
  • File out mitre
  • Trial fit and reduce tube length gradually until it fits at the correct angle
Top Tube
  • Find long and short butt ends
  • Ensure that you shorten the tube by cutting metal off the long butt end
  • Mark Centreline
  • Mark top of tube
  • Mark seat tube to top tube mitre (the bigger cut out goes at the bottom of the tube)
  • Measure tube length based on CAD drawing then add 5mm
  • Mark top tube to head tube mitre (the bigger cut goes at the top)
  • Cut mitres and trial fit
Seatpost clamp
  • Either use a lug or cut a bit of sleeve to the correct dimensions
  • ensure that the sleeve has an internal diameter very close to the seat tube outer diameter
Chainstays
  • Measure length
  • Check to see how much of the dropout will insert into chainstay if using a tabbed dropout
  • Cut to length by removing metal from big end.  Required length of chainstay= distance bottom bracket to rear axle centres, minus half of BB diameter and the remaining length of the dropout once inserted.
  • Cut mitre as per CAD template, position mitre template so that centreline is at top of oval and largest parts of the mitre are top/bottom
  • Place in jig and use dropout in jig to mark centre line at back of chainstay
  • hacksaw slot a little narrower than dropout then file to size
  • Place in jig
Seatstays
  • Check that the taper occurs after the point where you are going to need to cut a chunk off the fat end.
  • Cut slot in smallest diameter end as above for the chainstays.
  • Insert into jig and measure length by eye
  • Cut to length +15mm
  • File to length
  • Place in jig.

Day 9: Sunday

Rear triangle and more filing.

 
I was looking forward to today!  Today marks an important point in our frame building - cutting and filing the final parts to make a complete frame.  Once this is complete, it'll just be the forks to make.

The rear triangle of a bike frame consists of chainstays (along the bottom), seatstays (from the seat tube down) and the rear dropouts into which the rear wheel is clamped.

First off I had to mark out and mitre the chainstays at the bottom bracket end.  Easy enough with the mitre templates provided by Bike CAD Pro, once you've measured a few lengths and done a little maths.  It would have been a little tricky without the computer-generated mitre templates because the chainstays meet the bottom bracket at 90 degrees in one plane but are angled out by a few degrees in another plane to give enough width at the dropouts to accept a 130mm rear axle.  

Another tricky bit was accurately marking the centre line along the top of each chainstay.  If I were to do it again (or rather when I do it again!) I'll use the mitre template to cut the mitre as it's obvious where the top of the chainstay is (it's oval in cross section) and then use the jig to mark the top at the dropout end once it's fitting snugly to the BB.


Anyway, once the mitre is cut, you can then cut a slot at the dropout end using a hacksaw and then a file to tidy it up.


The seatstays are even easier, especially since I'm using some very nice wrap-around tops for mine which negates the need to cut a complicated mitre at the seat tube end.  So it was just a case of cutting the slot for the drop out at the thinnest end and then reducing the length by chopping bits off the top end until it all fits nicely.

It should also be pointed out that before while doing all of the above, there was a fairly lengthy session setting up the jig and rear dropouts.  I've intentionally left the rear dropouts a little flatter than the Raleigh frames that I've seen so that if I want to go fixed at any time in the future it'll be easier to get the chain tension set up.

Here's the complete frame in the jig:


Once that was set up, it was time to decide on the braze-ons that I'll need.  Here's the list and  parts laid out:


They'll go on tomorrow when the rest of the frame gets brazed. 

When I'd done all that, I got on with a bit more filing to tidy up the brazes on the front frame triangle.  They're not perfect but I'm fairly happy with them now they're filed down.  Not too bad for a first effort and I know what to do in the future to improve matters.


It got to about 5pm and I was knackered!  Think it's been a pretty steep learning curve so far and my head is feeling it a little. 

Saturday 19 October 2013

Day 8: Saturday

Brazing the front triangle together

It's probably fair to say that I'd rather have attended a meet and greet with the arachnids that inhabit our loft and out buildings rather than take the torch to my frame this morning but needs must!

I need to get more confident with brazing thin steel tubing together as it's all a bit nerve wracking and in the heat of the moment it seems there's a lot to remember - melt, move, rod..  it's just a knack but I'm annoyed that I was brazing perfectly well at the end of yesterday and this morning it fell apart rather. 

Still it wasn't only me - we all found it a bit tricky when it came to tackling our carefully mitred tubes. We were determined not to burn any holes through them and we all ended up with brazed frames and no holes.  Phew!

The first step was to take all the tubes out of the jig apart from the bottom bracket and seat tube and then tack-braze those two together. Here's Nick working on his bottom bracket:


 Once that was attached we could set the frame back up in the jig and tack the rest of the tubes together - for tacks per joint.

For some reason it was the tacking that I found the most difficult - I couldn't get both tubes heated to the correct temperature and then melt the rod to them...  Well, it was tricky but I got it in the end! 

Here's my bottom bracket tacked:


After lunch we got on with fillet brazing, basically joining the tacks up with braze.  For some reason this was easier than the tacking and after an hour or so the four main joints were complete:

Here's the frame tacked in its entirety, off the jig

Here is the bottom bracket joint prior to cleaning up:


 And the head tube joints (they're a bit messy so I'll be spending a long time filing them!)


My final brazing task was the most difficult bit yet - attaching the seat clamp sleeve to the seat tube.  Under Brian's expert direction, I heated both tubes to the correct temperature and began adding brass rod into the top to get it to drop down between the two bits of metal.  It seemed to take ages but in reality it was all over in about 15 minutes.  It was a case of over-brazing is better than under-brazing so we added quite a lot of rod to the edges and cutout circles on the sleeve, meaning that there was quite a lot of cleaning up for me to do with the file:


That's looking pretty tidy now even if I do say so myself, mind you that's the product of about 10 hours of work (cutting, filing and drilling the sleeve, mitering, tacking and fillet brazing the top tube to the sleeve and then brazing the sleeve to the seat tube and filing it all clean again.  The top of the sleeve will be the top of my frame when it's finished so I'll be trimming off that untidy brassy bit above it - no need to file it down.

One great thing is that the frames so far are so light!  The lack of lugs and Reynolds 631 tubing means that they're not far off being as light as a steel frame can get.

Tomorrow the frame goes back into the jig so that I can begin to set up the rear triangle and rear dropouts.  Really looking forward to it.


Friday 18 October 2013

Day 7: Friday

Learning to Braze

It was nearly crunchtime - I'd cut all my frame tubes to size (both on the mini bike and on the actual bike) so it could be put off no longer -  very nearly time to braze them together!

Before that, however, it was time to braze the bottle carrier bosses to my bike's seat- and down-tubes.  I went for a slightly more classy look by putting triangles under the bosses before brazing them in with silver. 

  
Here are the finished brazes, prior to removal of flux:


That done, it was time to get on with fillet brazing practice.

I started with simply brazing a couple of straight lines of brass onto a flat surface of box-section steel.  It was reasonably tricky to start with partly because I'd never done it before and didn't want to burn through the steel, but partly because I found the torch a bit unweildy and it's heavy to hold in one position for a long time.

After straights I tacked a couple of round sections to the box section and set about brazing them on, followed by fillet brazing the round bits I'd tacked a few days before:


After a break for lunch, I set about brazing the mini bike together.  By the time I'd finished I was getting a little better at it.  With a little more practice I think the actual bike will come along together nicely:


Note that we had to substitute a longer bit of tubing for the head tube as we managed to make the frame a little too big in the initial tacking.

Nearly finished - note that the bottom half is done, the top half is only tacked, also note the bottle cage mount on the downtube:


Having finished it off I just need to trim that head tube down to an acceptable size and file the brazes down to make it look pretty. 


Thursday 17 October 2013

Thursday (Continued...)

There are some absolutely lovely roads around here for bike riding - we had a great trip out on cycle route 17,  in amazing countryside, dodging the debris washed into the road by the heavy rain of the last few days.

We did just over 20 miles as far as Hawkinge and back; Nick suffered a puncture in his rear tyre and for once one of my home made bikes proved unreliable!  How can this be?!  The nut holding the crank on kept working loose which was a pain, but I did meet some friendly locals by knocking on their doors and asking to borrow a 14mm socket!  Think I need a new crank spindle as the threads on the non-drive side are probably a little worn.

The hills were a bit of a challenge compared with a ride in Cambridge so maybe the bike was coming out in sympathy with me.  A swift pint in the King's Arms in Elham made matters a lot more tolerable on the way home:


Here are a few pics taken on the way - I can thoroughly recommend a bike ride around here:


Looking forward to some proper brazing  practice tomorrow...

Day 6: Thursday

A day off - nearly!

Today was supposed to be a break from the course but we did have the option of spending at least some of the day in the workshop.

I decided to spend the morning re-making the seat tube collar as the original one I made yesterday was not up to scratch.  After cutting the sleeve tube to size (I extended it to 100mm rather than yesterday's 70mm one) I marked four centrelines on it, to split the tube into quarters lenthways.  This enabled me to mark out the pointed sections and ensure that I got the filing straight.

Once it was filed to size, I could mark out and drill the holes as before.  Well, nearly as before except that I decided to put four 10mm holes, one on each centre line and then one 6mm hole on each point.


Looks pretty nice on the seat tube:


With that complete, Nick and I are going to head off for a bike ride in the sunshine.  Would be rude not to....

Wednesday 16 October 2013

Day 5: Wednesday

The frame triangle comes together!

Today has been a lot better than yesterday: I started off by tidying up the downtube and then turned my attention to bottle cage mounts on the down and seat tubes. A quick measurement on my existing bike and a bit of estimating in conjunction with more measuring on the new frame provided me with the correct locations so I marked them up and drilled them.  6 mm holes to accept the braze on bosses, 65mm apart. They'll get brazed on tomorrow with any luck or perhaps Friday as tomorrow's a bit of a rest day when I'll probably go out for a ride.

That done, I got on with marking out the top tube with a centre line and contemplating the critical mitres in it.  After yesterday, I took a little longer in the calculating and measuring which that meant that after an hour and a half I'd ensured that I'd got the mitres correctly sized and located, and also the right way up which helps!


Guess what I did next?  Yes, that's right - filing!

Once the two mitres were cut, I could offer the tube up and begin to gradually decrease the length of it until it sat nicely in place.


This bit of metal won't be joining me on any bike rides!


With that done I breathed a big sigh of relief: the initial triangle was finished and sitting nicely in place:


However, I was celebrating too soon!  Turns out that that top tube is sitting right at the beginning of the seatpost butting so that's some very thin metal.  Also, I need to consider what sort of seat clamp I'm going to have.  A purpose-made lug is the easiest solution but it's also heavy and my frame isn't going to be lugged - that's a whole load of weight I don't need on the frame!  So.... I have to make a custom sleeve to go around the seat tube where the top tube meets it and also where the seat post clamp goes.

Here's what I have come up with - might make it a little more ornate tomorrow, or actually start again to get those drilled parts in line - I hadn't noticed that the step drill bit in the pillar drill was creeping out of my centre mark until it was too late so the large hole is slightly off-centre. I think I can do better!

Anyway the point of the holes is to make it easier to braze it in place - you can heat the whole lot up and then drop the brass into the holes.  They also look quite cool.  Tomorrow, I'm going to file the top of the sleeve a little to make it look a little  nicer, by adding a couple of shallow curved cut outs on the side.


Here's the back of the bike with a few bits in place (just held there for now) note the nice wrap around seat stays:


The eagle-eyed among you will have spotted that this means I need to re-mitre my top tube to allow for the extra diameter that the sleeve gives to the seat tube.  Damn it!

Anyway, I'm pleased with the progress so far - it's been hugely enjoyable and pretty challenging at times - the actual job in hand isn't that challenging but thinking it all through and having the courage to take the hacksaw to your valuable and expensive Reynolds tubes is.

I've been keeping a notebook and a list of critical dimensions as I've been going so I may well share some of them with you so you can see the process behind it.  But anyway, tomorrow's a day of rest so it's time I nipped out into Kent on the bike to see if there are any old and famous brewers anywhere near the town of Faversham.

Tuesday 15 October 2013

Day 4: Tuesday

Beginning to build the frame...

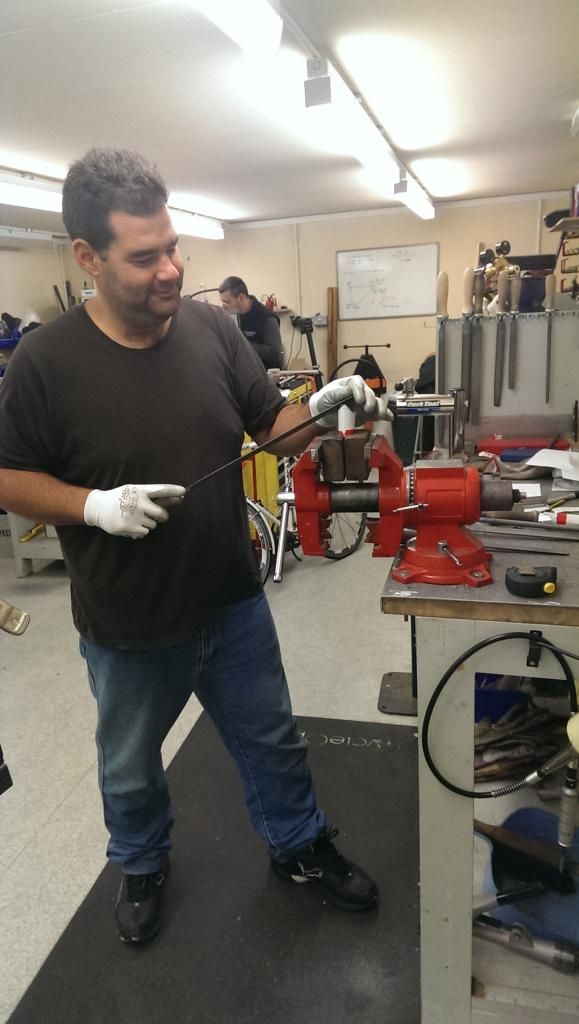
It all got serious today because we began to mitre our frame tubes.  First up was the seat tube - a fairly simple 90 degree mitre at the bottom so that it would butt up against the bottom bracket shell.  Reynolds 631 is a lot harder than the steel we had been filing so far so it was a bit more effort.

Let's rip into that Reynolds Steel!

The first mitre was soon complete, checked on the bottom bracket shell with a tri square to ensure it was straight. The second mitre was another 90 degree one on the down tube, again nothing difficult, except that once cut it was going to need a notch cut in one of its ears to allow it to butt up against the seat tube.

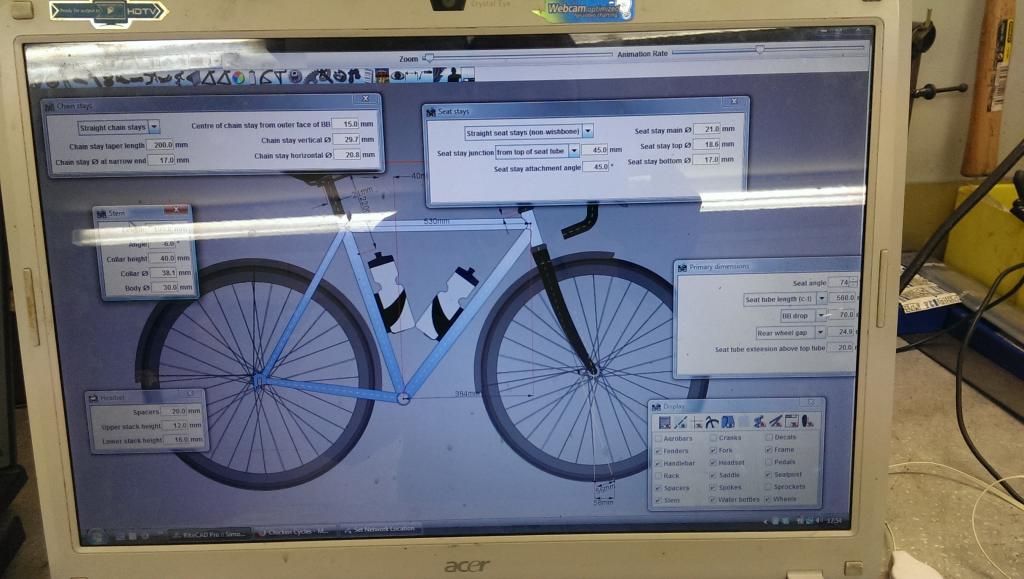
To get the angle correct for the notch, it was time to get the head tube, seat tube and bottom bracket shell in the jig. This was a slightly complicated operation involving all sorts of measuring, adjusting and re-measuring.

Bottom bracket drop - 70mm, thus the forks bolt into an axle this height above the bottom bracket shell boss.


 Here's the frame so far in the jig


With the jig set up the notch could be measured and also the length and position of the down tube on the headtube could be set up.

This is where it all went a little wrong for me - I set it all up and measured everything about 5 times but failed to take into account that I was measuring the distance from the edge of the notch to the head tube, and should have been measuring from the edge of the notch to the ears on the mitre joint with the head tube - a difference of about 7mm.  I didn't pick it up and neither did either of the course tutors so I broke out the hacksaw and chopped off the end of the tube.... Oops.

Luckily I'd added 5mm to the measurement before I'd cut it so with a little very careful and meticulous filing, checking backwards and forwards on the jig I managed to get the tube to fit without having to shorten the frame or make any alterations, except now the downtube is about 3mm lower than intended on the headtube - not a big issue!  Phew.


That was all I got done today...

As an aside, I'm beginning to realise how much I've taught myself by taking old bikes apart and putting them back together over the years: there's a 10-day course in cycle maintenance taking place alongside ours and of an evening the people doing it are complaining about how difficult it is to adjust front and rear derailleurs or how it's impossible to work out how get a cassette off a rear wheel...  And they're doing it with all the right tools, a course book to show them what to do and with the bike held exactly at eye level on a purpose-built stand.  Perhaps they should try working it out for themselves in a draughty garage with the bike standing on the floor - there's a lot to be said for that ;-)

Anyway I spent an hour this evening showing a couple of the chaps how to set up the gears on a mountain bike so that the derailleurs were both in line and changing with indexed precision.  They soon seemed to work it out once they could see how the adjustment screws worked...

More nerve wracking mitring and hack sawing tomorrow I guess...


Monday 14 October 2013

Day 3 Monday

More Filing!

Nic and Ian spent the morning finishing off their mini bike frames and seeing as I was at a bit of a loose end, I asked it I could use a few off-cuts of smaller tubes to make the rear triangle for mine.  Not as easy as it sounds as the angle and off-set, combined with two different diameters of tubing makes for a very odd-shaped mitre.

Here are a few pics of the gentlemen filing their tubes:

Nick Filing


Ian Filing

Here are two of the back tubes with my frame, along with my first bit of tack brazing (see below):


We also chose the tubing, lugs, dropouts, forks etc for our actual frame.  I had previously wanted to build mine in Reynolds 853 but was convinced in the end to opt for the 631 as it's easier to braze for a first-timer and is also perhaps better suited to my bike design.  I've also opted to go entirely for fillet-brazing (instead of using lugs) to join the frame tubes together.  The only lugs will be the fork boss and a bit of steel around the top of the seat tube which I'll hand-cut to shape before attaching the seat bolt braze-ons, attaching it to the main seat tube and then cutting the notch in it to allow it to clamp the seat post in place.

Here is my bike frame in IKEA format:


Once all that was sorted out for the three of us, I had another look at my bike frame design which Brian (our teacher) had tweaked a little.  He'd managed to get the head tube a little longer by reducing the number of spacers on the stem and shortening the stem a little. Also setting the length of the forks to give enough space for a 700x25c tyre and mudguards ended up shortening them which gave valuable millimeters to the head tube:

I need to get a copy of this software and play around with it so that I can find all the important bits and understand what the implications are of changing each detail. 

The last part of today was learning how to braze.  We started off by brazing the water bottle bosses to the downtubes of our mini frames - so far so good!  I made sure that mine were correctly spaced at 65mm:


Don't worry about all the discolouration around the holes - it's just flux which washes away in water.  Then we did some tack-brazing - basically tacking a few tubes together.  It's reasonably easy once you get the knack so you don't burn the tubing, but there are subtleties which I won't waste your time with!

Me brazing:


After a reasonably full day, Nick ad I took Brian's Garmin device and one of his very nice bikes out for a 22km bike ride out in the countryside of Kent.  What a beautiful part of the world - very nice little roads and villages.  Saw a fox out hunting the pheasants:


I think we're beginning to file the seat tubes of our actual frames tomorrow - very scary stuff.  One thing I learned is that seat tubes have a top end and a bottom end - or more accurately, that it matters which one's which.  The seat post will only slide in on one end so when cutting it to size you have to be a bit careful that you cut the right end so that you can get your seat post all the way into it.....  What doesn't help is that tube manufacturers don't have a standard notation for the end you cut - some of them put a saw symbol to tell you to cut - others put a saw symbol to tell you not to cut... Great.  Always slide your seat post in before reaching for your hacksaw!

Sunday 13 October 2013

Day 2: Sunday

Mitre joints: filing and more filing.


First task was to take a length of cheapo tubing and create a mitre joint (basically file semi-circles into the end so that the tube could butt up against another one).

Once we got the hang of different types of files, we set about creating a perfect 90 degree mitres.  Then 4 more.  Then a few more.

My friends, the files - note the big bastard on the right*:


*Barstard is a type of file for all you people who worry about Political Correctness.

It seems like the whole day was spent filing semi circles in the ends of tubing.

The main exercise for today which took all afternoon was to draw out a mini bike frame in real size on a sheet of A4, measure the lengths and angles before cutting the tubes to length and mitring them to fit.

The most tricky bit was the bottom of the down tube where it joins both the bottom bracket and the seat tube as you have to put a double mitre in it.  Still, it was an enjoyable exercise and I guess we'll be brazing the frames tomorrow.

Here is what I achieved today:


Day 1: Saturday

Bike Fitting and CAD 

The course kicked off with an intro to the workshops, tools, tubing etc.

First task was to use an Italian bike fitting jig (imagine a turbo trainer bike with no front wheel and adjustable frame, saddle, and bars) to ascertain the ideal frame geometry for each of the three of us doing the course.

To give you the basic method, you set up the seat tube to be about the right length and get measuring!  The ideal is that when the crank is very nearly at bottom dead centre (perhaps 5 degrees before), the angle from the ankle to knee to hip bone should be around 35 degrees.  Once you've achieved this by adjusting the seatpost height, you then check to see if the front of the knee is above the pedal axle.  If it's not, move the saddle backwards or forwards as required, then re-measure the leg angle.  Once both variables are within tolerances, you can measure the distance between the centre of the crank and top of the saddle.

Next thing is to adjust the length of the frame and height of the bars to the point where the rider is comfortable - again by trial and error and a lot of it is down to feel and an experienced eye.

You end up with a series of measurements (here are mine):

Drop from saddle to hoods: 60 mm

Centre of crank to top of saddle: 710 mm
Saddle set back: 40 mm
Centre of seat clamp to centre of bars: 640 mm
Centre of  seat post to centre of bars: 610 mm
Front of saddle to centre of bars: 470 mm
Front of saddle to Hoods: 630 mm

Jig Settings
Angle: 73 Degrees
Seat Tube Length: 560 mm
Top Tube Length: 530 mm

Once in possession of the critical dimensions, it's a relatively easy job to transfer it to BikeCAD Pro.  Here's my first attempt at a bike frame:


I chose to go with a horizontal top tube to keep things classic-looking.  I always think that road bikes look odd with sloping top tubes...  This frame still needs some work on it as the head tube is too short (mainly because I'm insisting on a horizontal top tube!) but as long as the three points where the rider connects with the bike are in the right place a lot of things can be changes around.